Winglets for "Libell"
This page describes winglets I made for
small flying wing I'm building.
If you have any comments or suggestions please send me an e-mail.
Arne Ansper <arne@cyber.ee>
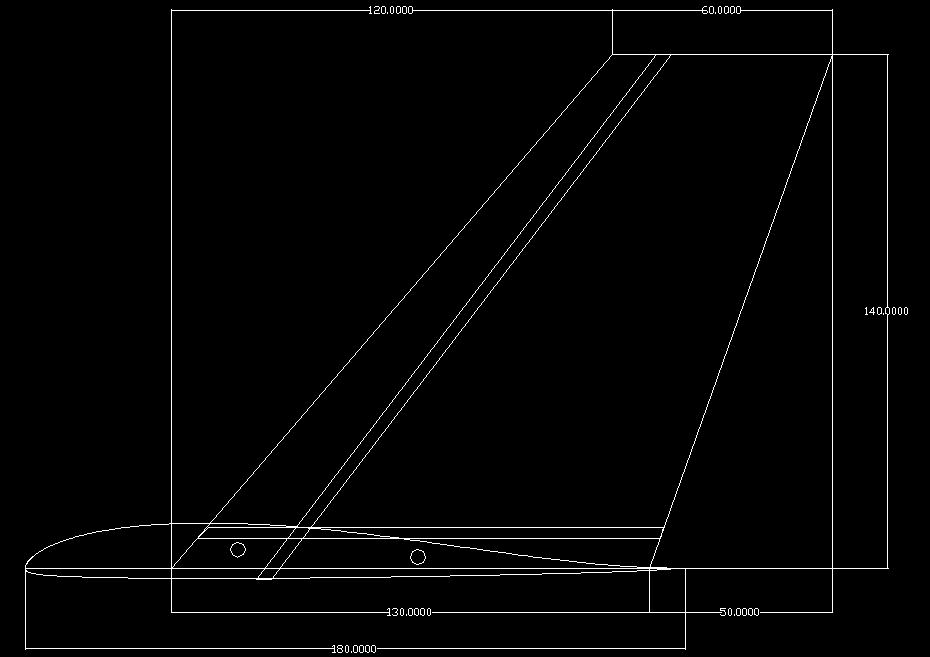
Plan
Construction
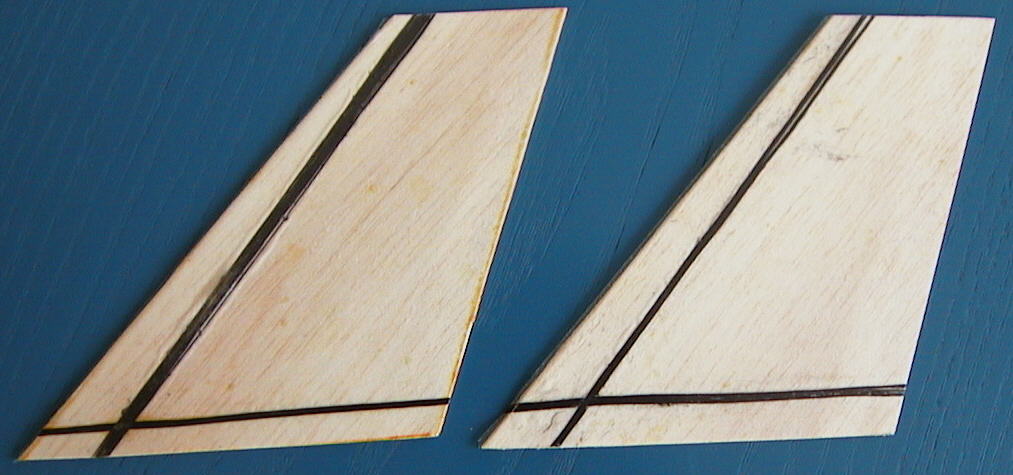
I used 2mm balsa sheet for winglets. Cut them out with metal
staightedge and hobby knife. Rounded the leading edge and tapered
the trailing edge, so that it was about 0.5mm thick (maybe even less).
The taper was about 2cm wide.
I weighted the winglets on postal scale and the pair was 6g.
This was my first job with fiberglass and since the winglets are
not so important and are quite easily replaceable I wanted to try
out all the new things that I will need when I will cover the wing.
That's what I did:
- I used laser printer transparencies for carriers. Waxed them
once with Norpol W-70 and then polished. Copied the winglet plan
on the other side using permanent marker. Put them away for a day.
- Sprayed the baking paper with Tesa contact adhesive (like 3M77),
let it try a little bit and then glued the
fiberglass to paper (in some places there was probably too much glue).
I used 27g/m2 fiberglass.
- Cut out four identical pieces. It was really easy :)
- Cut the carbon tows. I had some 130g/m2 unidirectional carbon
tow and I wanted to use it just to get some experience.
- Next day, mixed the epoxy (it was Ampreg-20 from SP Systems, probably
slow hardener). I used some small scales and coins to get 100:25 ratio.
It was quite easy actually. I mixed 10g of resin.
- Removed the baking paper from fiberglass. Some contact cement
remained attached to the fiberglass: those are the yellow stains
and spots on the winglets below. Positioned the fiberglass on carriers,
spread the epoxy, added carbon tows and removed excess epoxy with
toilet paper.
- Put it all together. I don't have a vacuum system. I used some heavy
stones to press the fiberglass against the balsa core. I used my kitchen
table as a base. On top of it was polyethylene sheet to protect the table.
On top of that was some sort of soft material (It is about 3mm thick,
usually white, shiny, it is used to pack furniture, audio equipment, etc.
It is somewhat compressable, that why I used it. My idea was, that
stones will compress it, but on the tapered trailing edge it will have
enough power to push the fiberglass against balsa.) Then was lower
carrier. On top of that was balsa. Then upper carrier. Then another
layer of soft material, then kitchen shelf and then stones (about 20kg).
I had two such stacks standing side-by-side: one per winglet.
- I let it stand for 20 hours (as epoxy manual said)
- Then I removed the mylars: their were stuck. The epoxy was still
somewhat sticky.
- I cut away the excess fiberglass around the winglet.
- Then I put the winglets into oven and baked at 50C degrees for
10hours (as epoxy instruction recommend).
Pictures
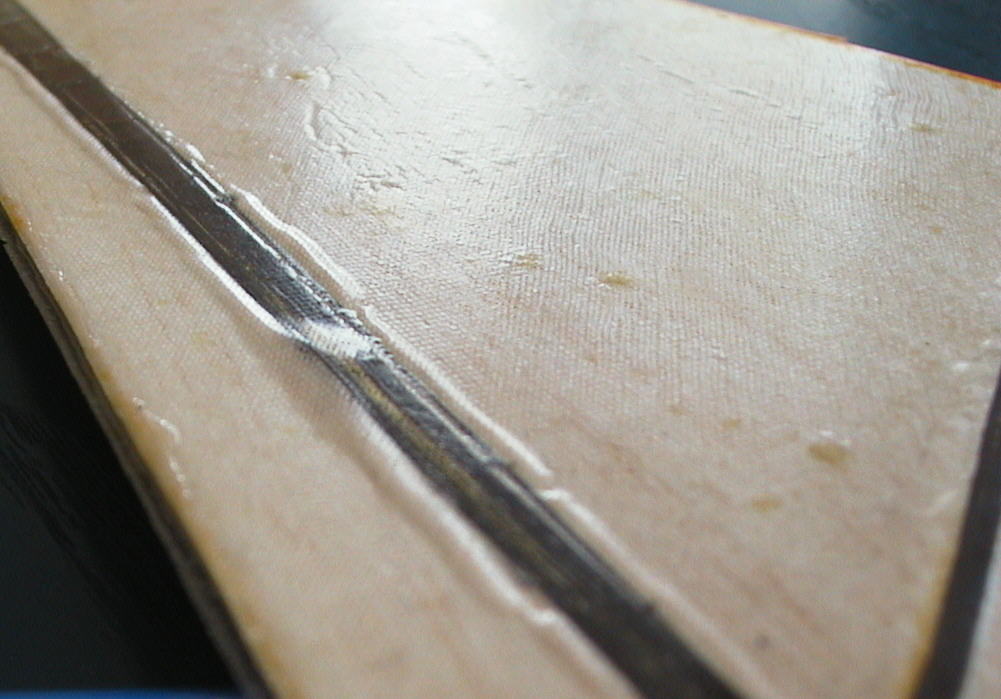
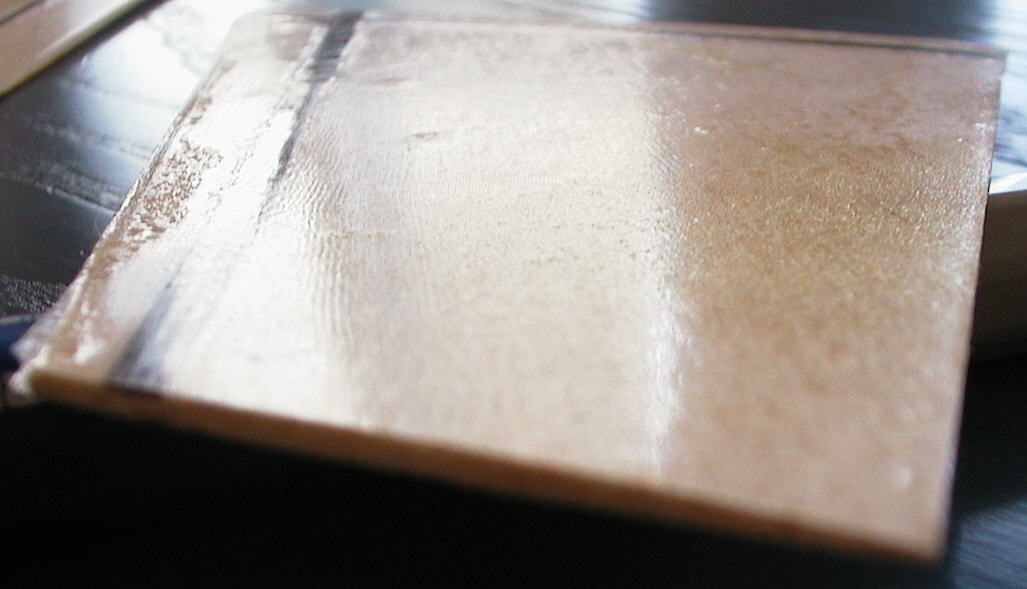
The fiberglass is not correctly attached to the balsa near the carbon
fibre tows. There are bubbles along the carbon. I asked about them and
several people suggested what went wrong:
- Pressure was inadequate (too small).
- I removed them from press too early.
- There was not enough resin near the carbon tow. I used the toilet
paper to remove excess epoxy after I layed down the carbon. Perhaps I should
leave the carbon last?
This is the biggest bubble.
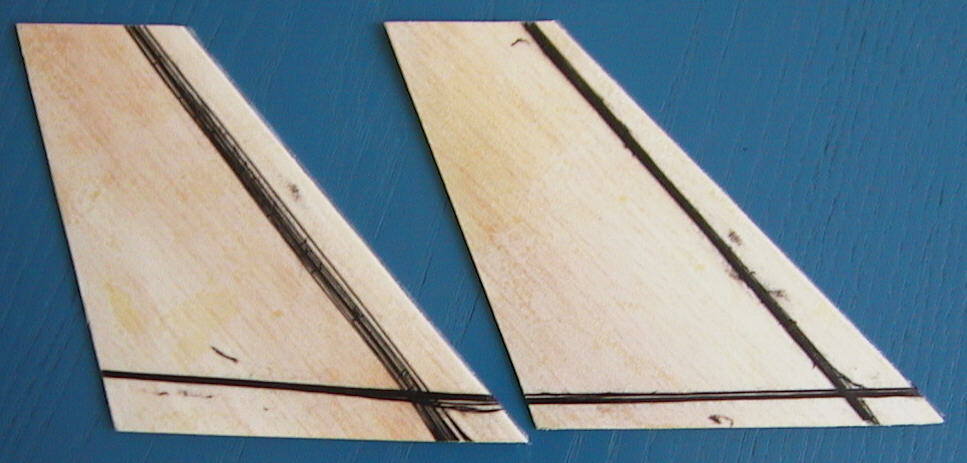
The yellow stains and spots are remains of the contact cement.
I should use less contact cement next time to keep the fiberglass clean.
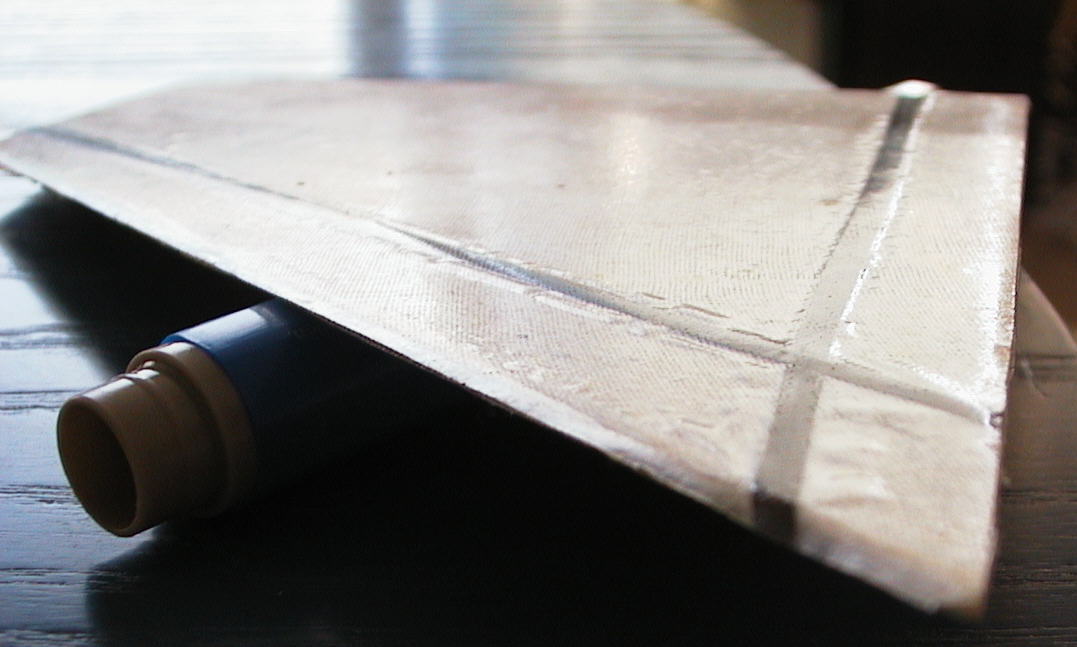
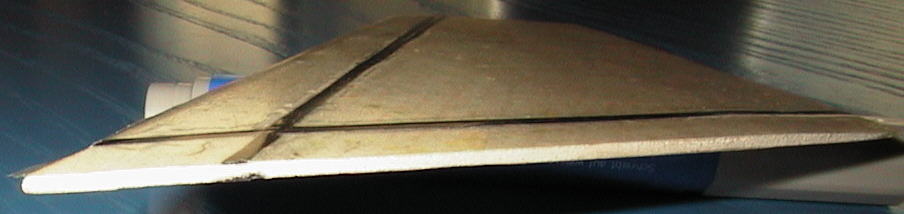
You can see the tapered trailing edge.
Results
I weighted the completed winglets. They were 10.5gm (pair). Not too bad.
The fiberglass was about 1.3gm, carbon was below 0.5gm and the rest was
resin. But I later found out that the scale that I used to weight
the cores (6gm) was totally inaccurate. So I really don't know how
much resin went into those winglets. Anyway, they came out twice
as light as I hoped.
I will probably cut the biggest bubble open and put some CA under the
skin. I will seal the edges with CA too.